


Struggling with getting your first push up? Or getting better at push ups? We got you!
In this blog we are going to cover three main points:
- Push Up Technique
How to maximize your push up mechanics
- Push Up Progression
A progression to crushing push ups
- Push up programming
How to plan out your training to get this!
Okay, let’s get into it!
Push up technique
Let’s start off with a general overview of the push up position & form.
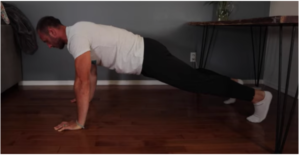
For our starting and ending position of each rep, we want the elbows extended, hands in line with shoulders, about a shoulder width placement, chin tucked back, abs & glutes braced, and toes about hip width apart.
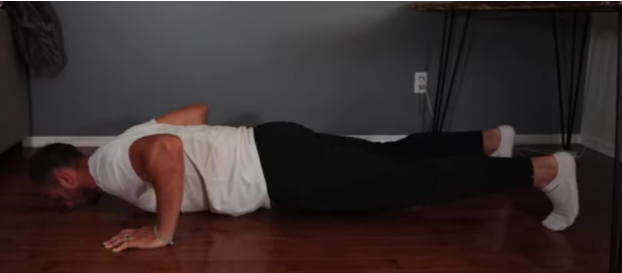
In the bottom position, we want to focus on maintaining our rib and pelvic positioning, not over extending in the bottom, keeping our head back, not reaching our face to the ground, and bringing our chest close to the ground.
When we go to execute the push up, there are a few key things we highlight to focus on that people often neglect, holding them back.
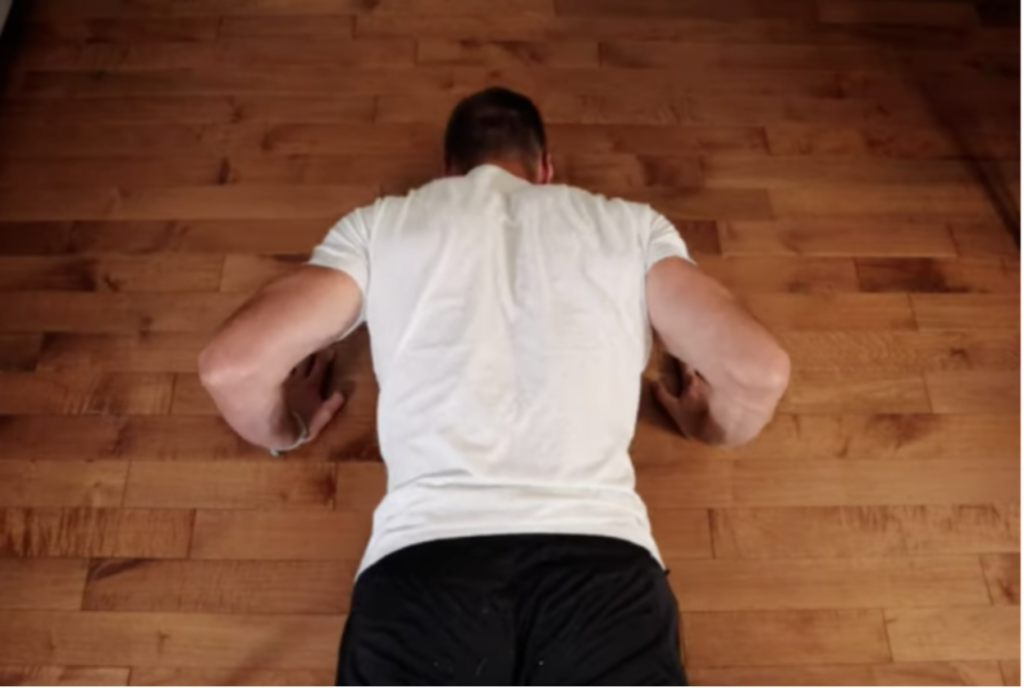
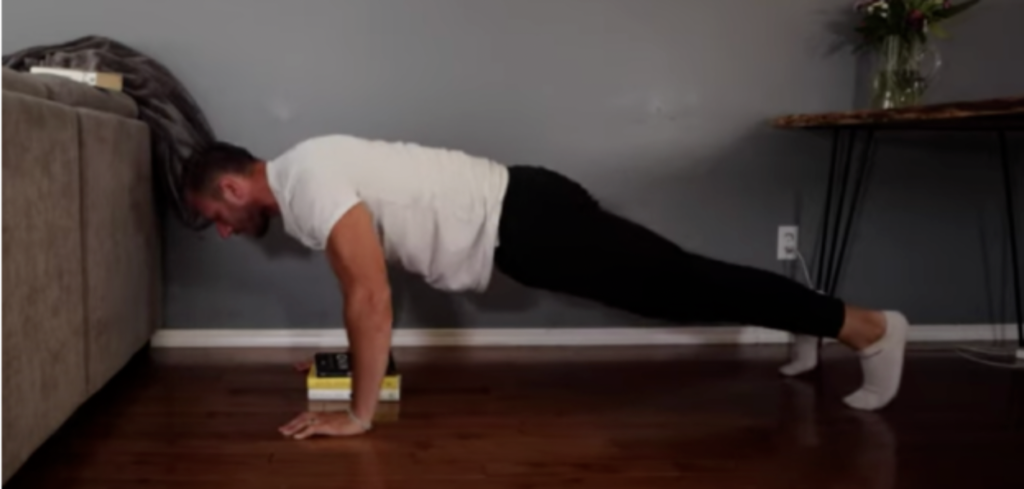
The first thing – head/neck motion.
If you watch most people who aren’t good at push ups you’ll see them reaching their face to the ground, trying to get closer to the ground without their chest or shoulders moving.
This is one of the most common mistakes beginners make and it can be really hard to fix, but if you want to get the most out of your push ups, reduce neck strain, and get better at push ups, you’re gonna want to fix it.
First thing to try is just trying to keep your face back, making a double chin before you begin each rep.
Second thing to try if that didn’t do the trick is putting something small down on the ground where you face is going to make contact and use that to remind you to get your face back. A small book or deck of cards is good for this.
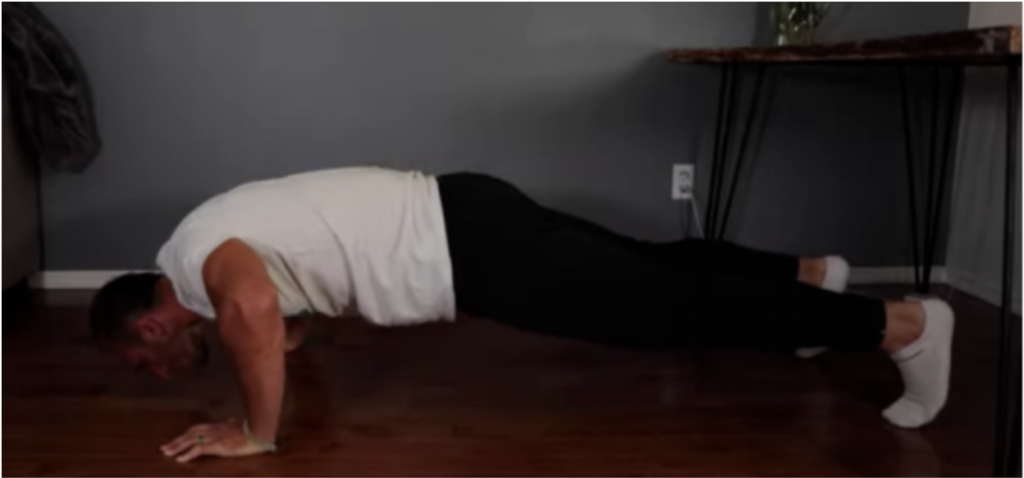
A second common mistake that beginners make is to flare their elbows out really far to the side.
This is going to be a less mechanically advantageous position to press from, and generally overloads many of the shoulder structures, causing people to have discomfort as they go through more range of motion.
Shifting to a more tucked position, with elbows around a 45* angle from the body will be helpful to encourage a more comprehensive distribution of upper body pressing muscles involved and to allow less stress on structures not as tolerable to loading.
Experiment with it on different variations, but more often than not, we want approximately this position.
A third common mistake we see with beginners is going straight up and down, not having an arcing motion.
You see when you go straight up and down at the shoulders, you keep more loading on the triceps, and less on the pecs and shoulders. This isn’t inherently bad, but the triceps by themselves aren’t that strong compared to all of the pressing muscles combined. Simply trying to have a small arcing motion as you go down, where you keep a slightly more vertical forearm will encourage more incorporation of your upper body into the movement and let you pump out more reps.
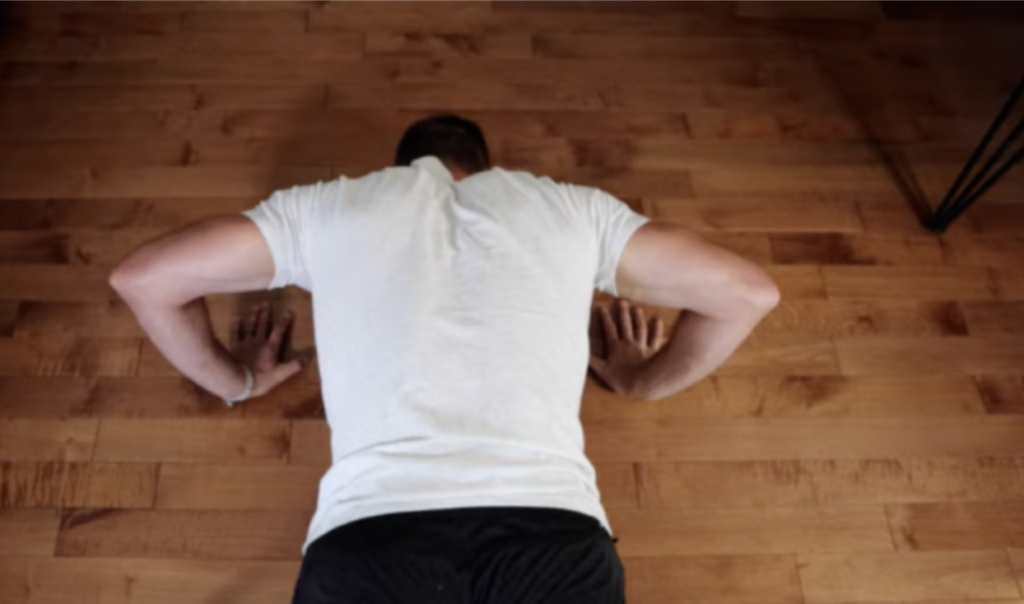
Our fourth common mistake is in regards to the trunk positioning. While push ups are thought of as an upper body exercise, they’re really a total body exercise that works the core to a good degree when done well.
Hips sagging in the movement takes out the effort the abs have to play in the movement, reducing the benefit we get from the movement for the trunk.
As well, by the hips sagging, we actually load the upper body relatively less, which takes away from the goal.
So if you’re trying to strengthening your upper body and core, stop letting those hips sag!
Push up progression!
This will help take you from struggling to do a push up, to absolutely demolishing push ups
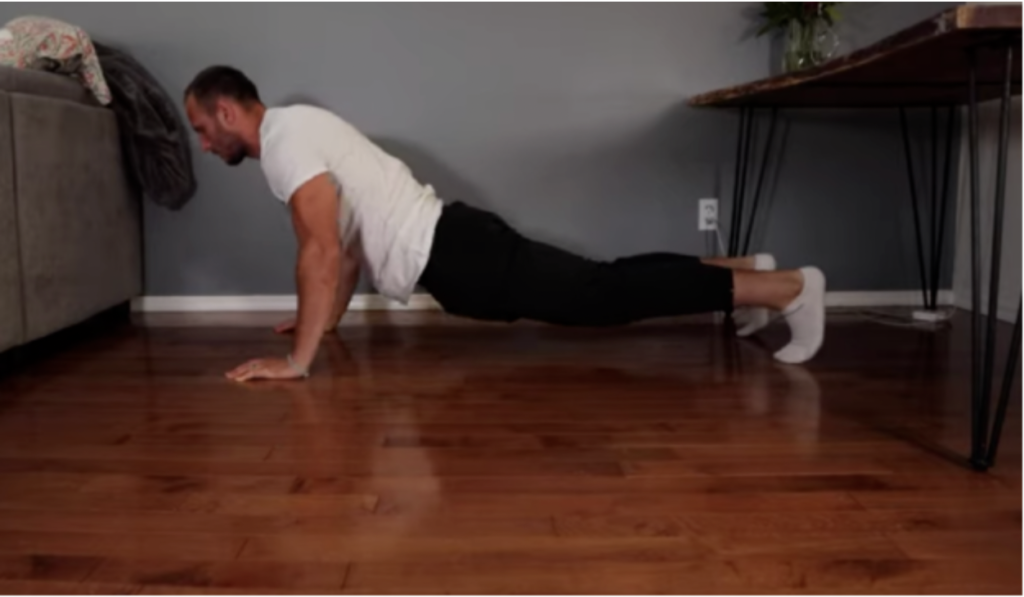
First up, the hands elevated push up.
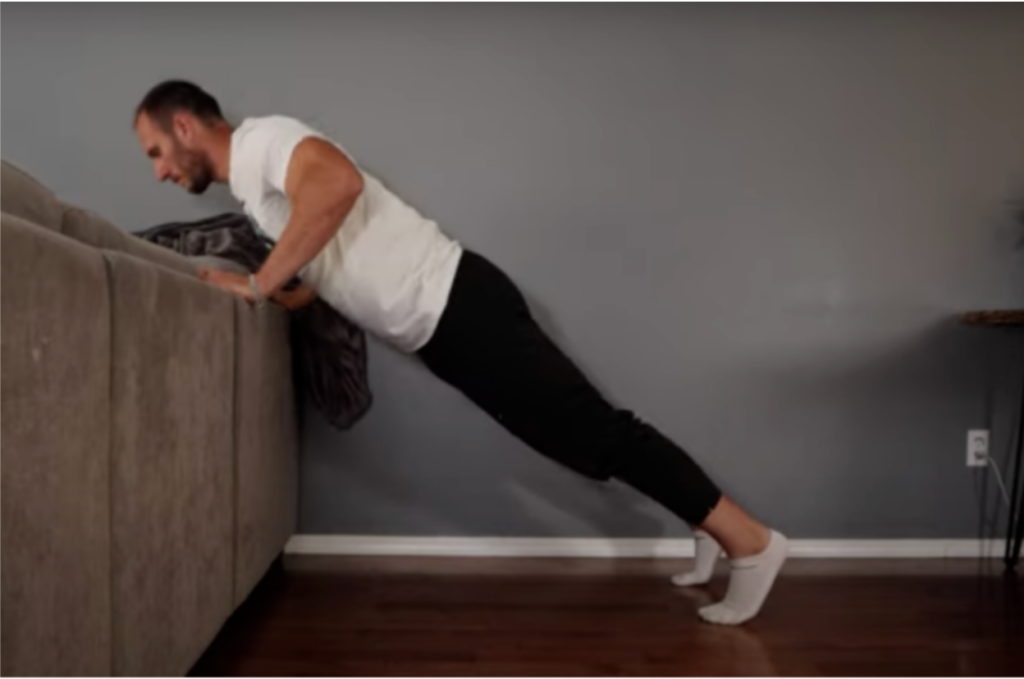
This is a great option as we can scale it to where the person is at – either higher or lower for their needs.
If you aren’t that strong just yet, start higher and work there, progressively lowering over time.
You’re going to want to try and find a hand elevation that lets you maintain the technique we discussed so far in the blog, and let’s you pump out about 5-15 reps.
For those training at home, try the kitchen counter, table, dining chairs, or side of a couch.
For those training at a gym, use a bench, squat rack, or smith machine.
Now some people are going to ask about knee push ups, but we don’t really love those since they significantly reduce the trunk challenge and learning about the aspect of arcing off the toes. If you prefer these, crush them! But otherwise, stick with the hands elevated version when starting.
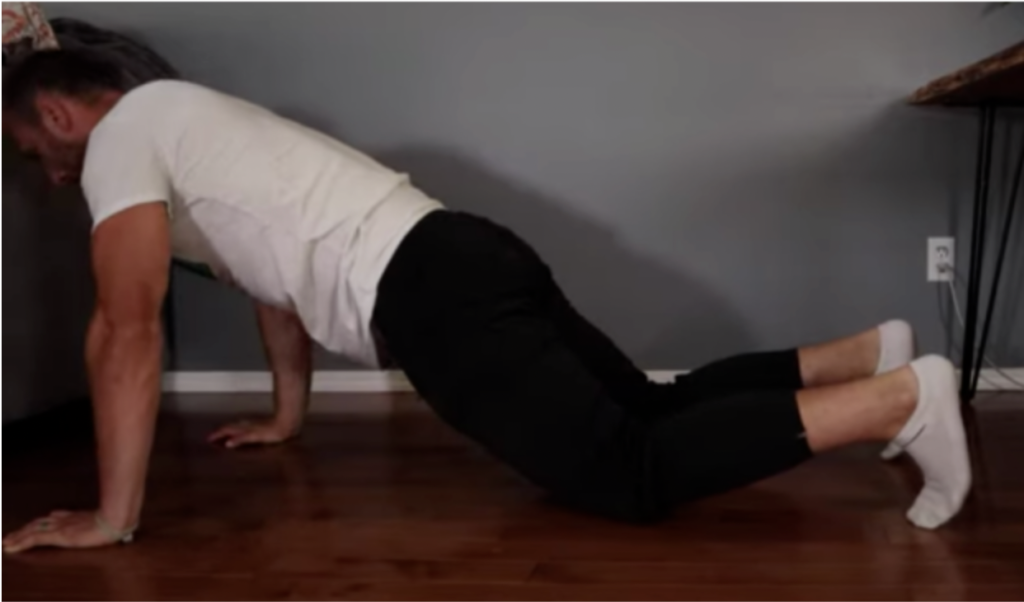
The next variation in our progression is going to take us to the floor and work on honing our position. This will be the eccentric push up.
Here you’re going to start a regular push up on the floor, work on maintaining your positioning and go slow to the ground. Once you get to the ground, then drop to your knees and push back up to start.
This works on challenging you to get stronger through the eccentric where we can handle more loading, but then uses a mechanical drop set to get back up and reset.
If you find you’re getting into higher reps with it, then three things to try:
- Go way slower on the eccentric or even pause
- Try getting a good 10 sec lower in or a 10 sec pause in the bottom
- Use a band to resist you in the movement
- Add a deficit to let you sink deeper into the movement
Once you’re feeling good with these we can start working in partial range push ups!
Here we go through the same thing, but we set up targets, such as a few books, for our chest to contact each time. Then over time you can work to get lower and lower. As you consistently do these, you’ll find that you can consistently do high quality reps close to the floor, and then can ditch them and start working from the floor!
It’s common for people to rush and try to get the floor version, so instead take your time and gradually work towards the ground.
Push up programming
Now instead of just randomly doing push ups here and there, lets discuss how to best create a program that encourages maximum performance in the long term so you can crush multiple reps.
Before we get into that, if you want a plan that puts this together for you, check out the plan we made here.
With your program you want to focus on a few things:
- Technical proficiency
- Generally best done with lower reps on sets with a lower exertion
- Build specific strength
- This is usually going to be done by picking a move in the progression you can do for 5-10 reps in a set with a higher exertion.
- Accessory movements
- Here we pick exercises to support weak areas that are limiting your performance.
Most people are best off essentially picking 2-3 days per week to train push ups where they set up one day as a technical proficiency day, and one day focused on building specific strength.
Each day you can start off with a push up variation that allows you to focus on the goal of the day, and then follow it up with accessories that will hit your weak areas.
Hope you enjoyed the blog!
If you’d like a video version of this, check out this video we made on it: