


Today we’re gonna go over how to get your first pull up!
The pull up is one of those classic bodyweight movements that so many people look to achieve.
However, it is not so easy to do and a lot of people struggle to get one.
In this blog we’re going to break down:
-
Technique & common mistakes for the pull up
-
A Progression to get the pull up
-
Outline of a program to get you that first pull up
So if you’re someone who hasn’t tried to get a pull up yet, someone who has been trying but hasn’t been able to get it, or someone who has gotten one but is inconsistent with it…
This blog is going to help you out and get you on track!
So, let’s get into it!
We’re going to start off by talking about the technique for the pull up.
The first thing to discuss for the technique is our set up.
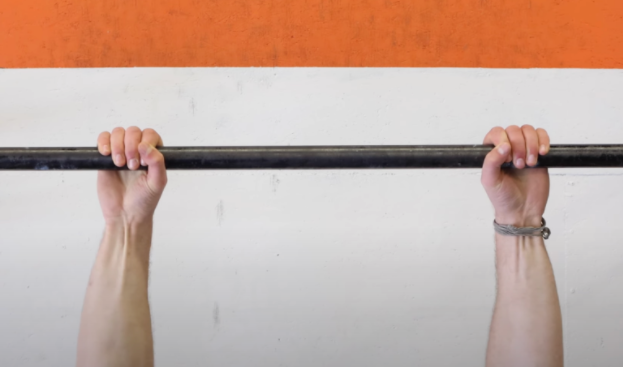
To start off with, let’s look at the grip.
When we are talking about the pull up, usually we’re talking about the overhand, palms facing away from your grip.
You want to get a full grip on the bar, fingers wrapped and thumbs locked in.
People can try and play around with their wrist positioning.
Some people might benefit from trying to have a grip that’s wrapped over even more.
This can help with grip and help some people put their arms into a strong position.
Your grip width is going to vary, but for most people having your hand about shoulder-width apart is going to be optimal.
The next thing to discuss is our core positioning.
For the trunk, it’s really common for people to be loose in their mid section, but if you watch people who are really proficient at pull ups – such as gymnasts – they look rock solid.
This position is called the hollow body position and it’s a great demonstration of core strength.
To learn it, we’re going to start off in a deadbug position where we are laying on our back with are arms pointing to the roof and our hips and knees bent so our knees point to the roof.
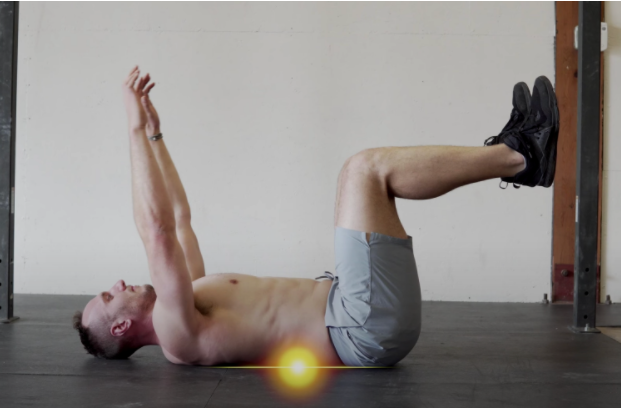
From here we want to focus on flattening out our backs and getting our abs active.
Then we can start to take our arms over head.
As you take them up, keep your back pressed into the ground.
For a lot of people, this might be a bit challenging, so if you are already trembling, just focus on nailing this.
If you’re not shaking yet, then we will start to extend the legs out.
If you can get your knees straight, your legs should be hovering just a bit off the ground.
This is essentially the hollow body position.
When we hang from the pull up bar, we’re going to try and replicate that position.
If you could only handle a knee tucked position, then rock that!
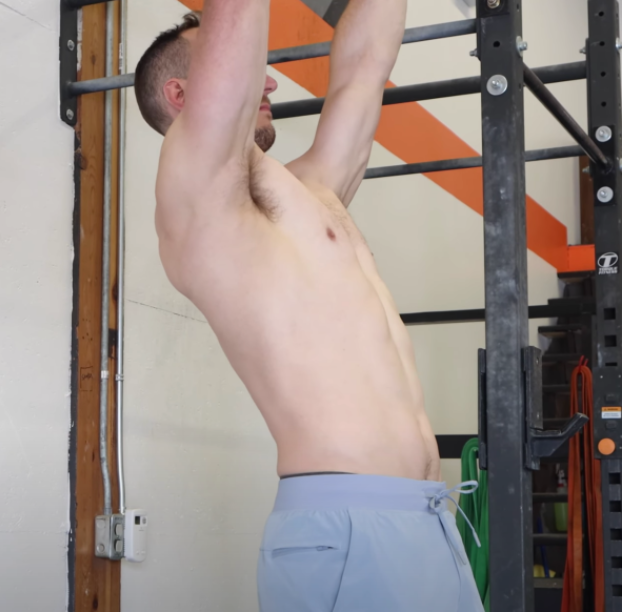
The next thing to tackle is the hand position.
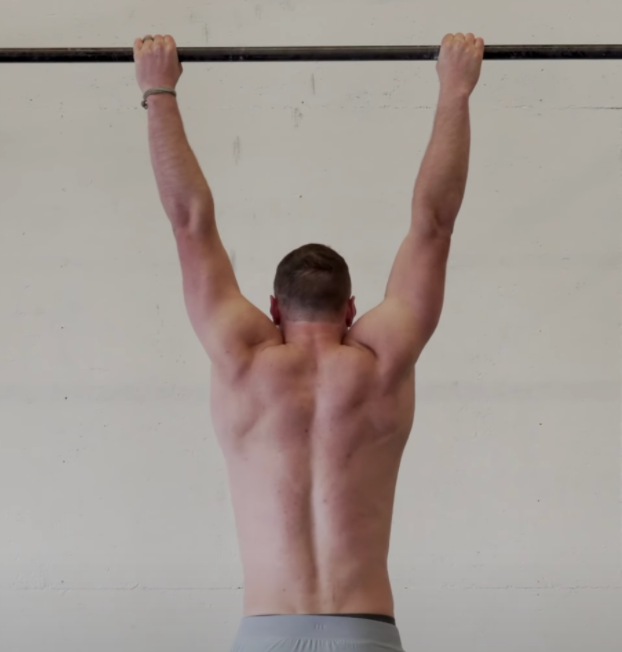
With our grip set up, our rock solid core position, we can now lock in our shoulders.
Having active shoulders in the pull ups is really helpful for starting the movement and can set you up for success.
With your shoulders in a dead hang position, our back muscles are at a disadvantaged position to pull.
We want to pull our shoulder blades down and slightly back.

As we do this you can think of having the shoulders down and back.
This is going to get our upper back muscles like our rhomboids and traps get more involved with the movement.
From here we can then get the lats more involved.
To do that, we’re going to think of doing a pullover type action.
For anyone who has done a supine pullover or a standing pullover, that’s essentially the motion we are thinking of.
If you’re having an active trunk position, it’ll encourage an reclined body angle.
Setting the shoulders and lats is something that we see people are more proficient do naturally each time they do a rep.
For a novice it can be helpful to start and do it deliberately each time.
The last thing to touch on before we actually start pulling is our head position.
It’s common for people to look up and focus in on the bar.
That’s not wrong but it can be irritable for some people and when we do a lot of pulling work it can add up.
Having a more forward set eye gaze and let your neck stay more neutral through out
From here we can start pulling.
If you set up well, then to work.
As you go, aim to pull your chest to the bar, not your chin.
Typically people focus on just getting their chin over the bar, and in order to do it, they just reach their chin really hard.
This can be really hard for those of you who haven’t gotten a pull up yet, but make sure to keep focused on that as you do your work towards getting your pull up.
Try to keep your chest up as you pull.
A lot of people will start to round their back as they pull.
So with the technique and common errors out of the way, let’s check out a progression to take you from no where close to a pull up, to repping them out.
The first move is an inverted row.
This might seem like an odd move to start with since it’s horizontal and not vertical, but it really strengthens some of the most important muscles for the movement.
It’s also a great choice because we can scale the movement very easily.
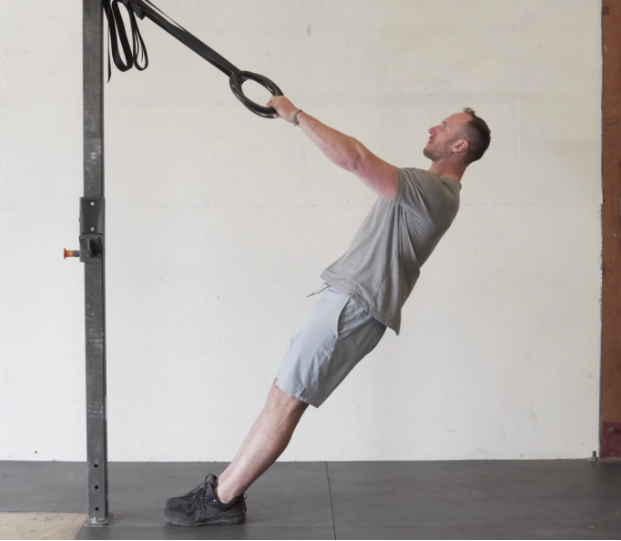
If you’re doing it with a bar in a rack, you can just the move the bar higher to make it easier, or lower to make it harder.
If you’re doing it with a TRX, Rings, or something else like a bed sheet tied over a door frame, then you can move more vertical to make it easier, and more horizontal to be harder.
This movement has been shown to elicit a very high activation of the mid back and lats, making it an excellent movement to build up that musculature for the pull up, while also working a relatively similar pattern.
From here we can transition into the low hip inverted row.
This is an inverted row pull up hybrid.
We can set it up the same way as the inverted row, but now we keep the hip down.
This helps to put more emphasis on our back muscles and makes it more specific towards vertical pulling.
The more vertical you get and the more range you go through, the more challenging the move will be.
You can even elevate your feet to have an extra challenge.
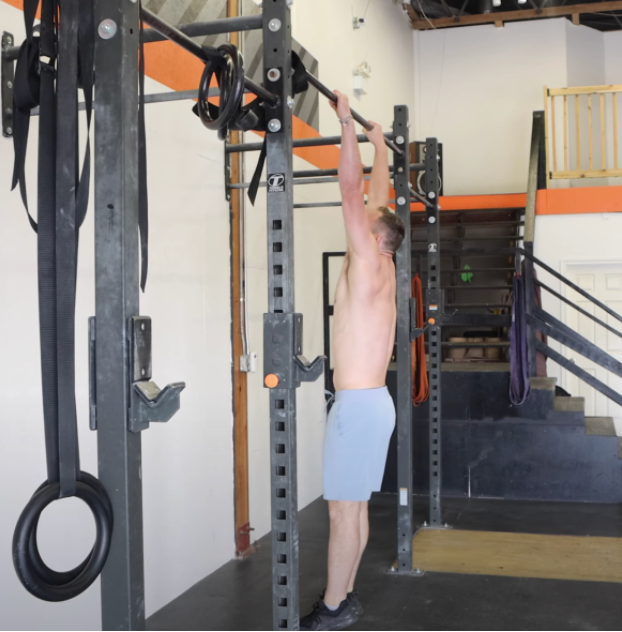
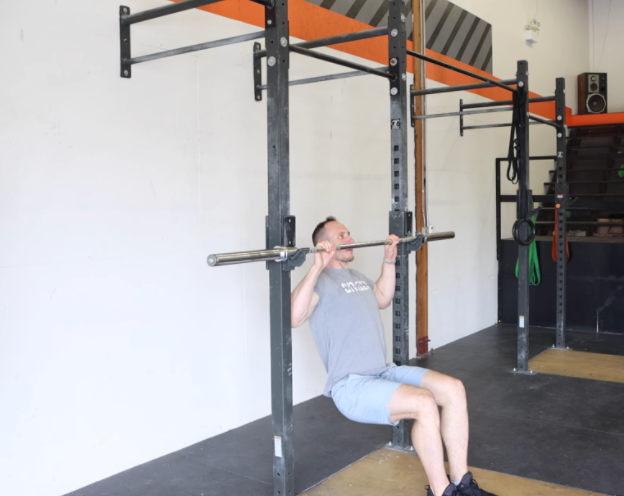
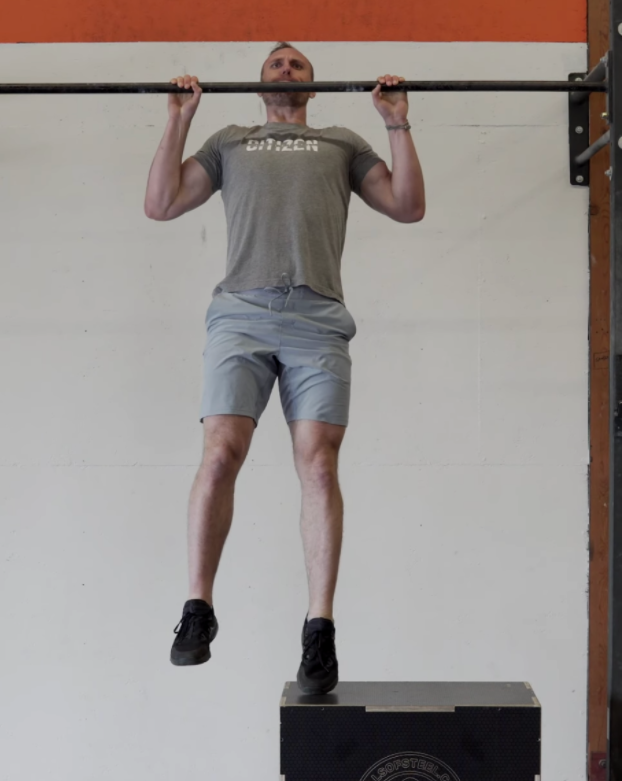
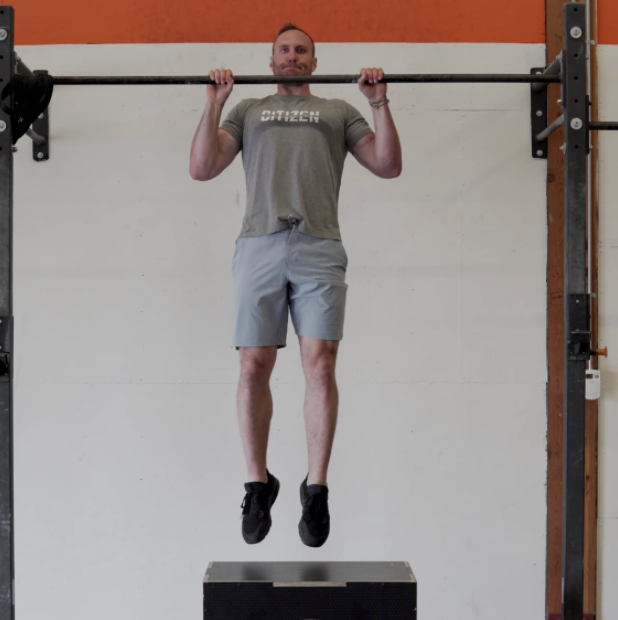
From here we can step it up and go to the pull up with leg assistance.
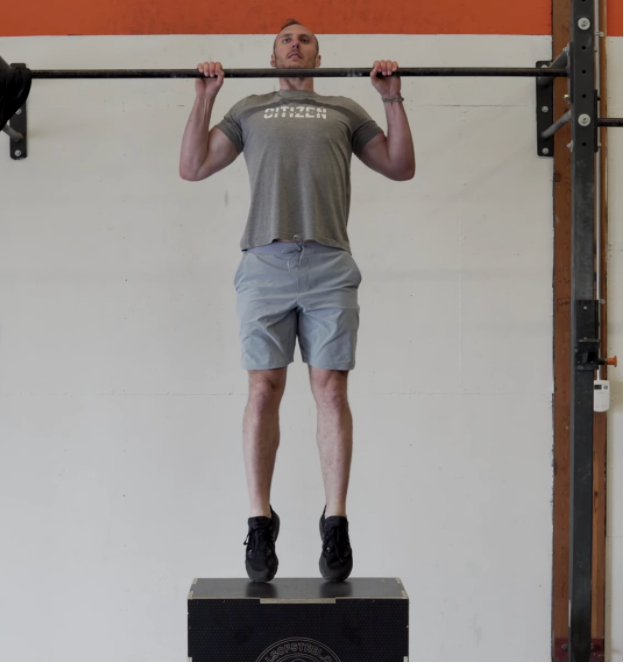
This progresses to a completely vertical pull and goes through the same patterning and gets us to work on all of the mechanics we discussed.
To set it up, we can do it with a box or bench and a pull up bar.
Or if your height doesn’t work for that, then we can use a bar in a rack and set it at the right height and work on taking it higher and higher over time.
As it gets higher, you’d utilize your legs less and less.
We can also progress this movement to only using one leg to assist.

This will help to reduce how much your legs help and put more emphasis on your back.
As we do all of these different variations, make sure you’re going all the way up and trying to pull really tall.
As well, focus on going down the full way and not cutting any reps short.
You can even let your shoulders open up more and work on coming in and out of the dead hang position and getting back into the hollow position.
Our next movements are going to get more challenging, so don’t jump right to these, make sure to build up a good base of these prior movements first.
The first movement is the eccentric pull up
To do this, we are going to use that same set up for the leg assisted, but now we are going to jump up to the top of the pull up and get into a rock solid position.
Then we are going to lower slowly – like really really slowly.
When a lot of people do these eccentric pull ups, I see them jump up and just fall back down in a second.
The benefit from them comes from lowering at a really slow pace, so focus on trying to get a 3-6 second lower at minimum.
As you get more and more proficient with it, you can build to longer eccentrics.
This is a great way to develop more control and strength for the pull up, instead of just flailing in an attempt to kip up to one.
If you can nail a 30-60 second solid eccentric, you should be on par to do a pull up.
The next progression is the paused eccentric pull up
This increases the demand on the last one by adding in pauses during the movement to force you to build increased tension and strengthen your back muscles.
Where you pause, and how many times you pause, will dictate just how hard this is.
You can pause at the top of the movement, trying to hold for 1-3 seconds at least, then lower down through the rest of the movement nice and slowly.
You can start at the top, lower down, and then pause at the middle of the rep, again trying to hold for 1-3 seconds and then lower the rest of the way.
You can start at the top, lower all the way to just before the full hang, and then pause with the last bit of tension for 1-3 seconds and then come down.
And then finally, you can combine them.
In our opinion, utilizing a pause at the top and the bottom is the most beneficial since those are the positions where people are going to struggle the most.
The last movement in the progression is the pull up!
The pull up requires good, consistent work.
We need to develop a stronger and more muscular back, shoulders and arms.
Set it up just like we discussed earlier and crush it!
If you aren’t quite able to do it yet, a few things you can try.
Firstly, a band assisted or machine assisted pull up
We didn’t include this in our progression because in our experience people often use these inappropriately when they’re really far away from being able to do a pull up and rely on really strong bands.
Instead, these are best reserved for people who need just a really light band to help them pattern the movement and build up volume.
Secondly, the pull up with leg assistance on concentric only.
We highlighted the leg assisted pull up earlier, which is a great option for people.
We also showed the eccentric pull up as a progression towards the unassisted movement.
Here we combine those two movements.
We start off with the leg assisted movement on the way up
Only utilizing that leg as little as we have to.
Then once we get to the top, we take that leg and we lift it off the box or floor and lower ourselves nice and slow.
You can build up to using less leg assistance and a slower lower over time.
At some point you’ll find that you can just lift that leg right up and crush it.
Try to stop yourself from trying too often though as that is something we find more novices tend to do in a rush to try and get that first pull up.
Instead, work hard, get in the volume, be consistent and you’ll get one.
How are you going to practically implement this?
Well we like total body higher frequency training, so we’d suggest for most people to try and utilize some variation of the progression at least 2-3 times a week.
For instance, if you train three times a week, you could pick one of the movements in the progression for each day.
Such as on your first day of the week doing eccentric pull ups, doing 3-5 sets to close to failure.
Then you could have a second lighter day where you do inverted rows for 3-5 sets of 6-10 reps with a few reps left in the tank each set.
And on your last day you could do the low hip inverted rows for 3-5 sets of 5-8 reps and really challenge yourself on those sets.
If you’re training the rest of your body in conjunction, then you’re on a good path to success.
In one of our next videos we tackle some of the best accessory movements that you can utilize to supplement your pull up program.
These can be movements that you put in after your main progression movement and help build up your muscular strength and capacity.
Now one last thing to discuss is bodyweight.
It can be a bit of an awkward one, but at the end of the day, if you weigh less, there’s less you have to pull.
For people who want to get a pull up and aren’t relatively lean, losing some weight while you’re also focusing on getting stronger and building your back, can help a lot.
This isn’t a requirement though, you can find videos of quite large human beings pumping out pull ups, such as world’s strongest men competitors who weigh upwards of 400 pounds.
Hopefully this helps!
If you’d like a video format of this blog, check out our youtube video on the topic!